How To Take The Stopper Out Of A Tub: A Comprehensive Guide For Every DIY Enthusiast
Have you ever found yourself stuck trying to figure out how to take the stopper out of a tub? It happens more often than you’d think, and it can be a real headache if you don’t know what you’re doing. Whether you’re dealing with a clogged drain, needing to replace the stopper, or just trying to clean your bathtub thoroughly, removing the stopper is a crucial step. But don’t worry—we’ve got your back! In this article, we’ll walk you through everything you need to know about taking out that pesky stopper like a pro.
Let’s face it, bathtub stoppers can be tricky little gadgets. They come in all shapes and sizes, and sometimes they just refuse to budge. But hey, before you call a plumber and spend a fortune, why not try fixing it yourself? With the right tools and some know-how, you’ll have that stopper out in no time.
In this guide, we’re going to break down the process step by step, so even if you’ve never touched a wrench before, you’ll feel confident tackling this project. And trust us, once you master this skill, you’ll wonder why you ever hesitated in the first place. So grab your toolkit, put on your problem-solving hat, and let’s dive into how to take the stopper out of a tub!
Read also:Gray And Brown Clothes The Ultimate Guide To Styling Timeless Fashion
Why Would You Need to Remove a Bathtub Stopper?
Before we jump into the nitty-gritty details, let’s talk about why you might want to remove the stopper from your bathtub in the first place. Sure, it sounds simple enough, but understanding the reasons behind it can help you decide whether this is a job worth doing.
- Clogged Drain: If water isn’t draining properly, chances are there’s something stuck in the pipe. Removing the stopper gives you access to clean out debris or hair that’s causing the blockage.
- Replacing the Stopper: Maybe your old stopper is worn out or broken. Taking it out is the first step to installing a brand-new one.
- Deep Cleaning: Let’s be real—bathrooms get dirty. Removing the stopper allows you to clean areas that are usually impossible to reach, ensuring your tub stays sparkling clean.
- Upgrading Your Tub: If you’re remodeling your bathroom or simply want to update the look of your tub, removing the old stopper is necessary for installing a new one.
Now that you know why you’d need to remove the stopper, let’s move on to the different types of bathtub stoppers you might encounter.
Types of Bathtub Stoppers You Need to Know
Not all bathtub stoppers are created equal. Depending on the design of your tub, you could be dealing with one of several types. Here’s a quick rundown of the most common ones:
Pop-Up Stoppers
These are probably the most common type of bathtub stopper. They work by using a lever mechanism that raises and lowers the stopper. Removing a pop-up stopper involves accessing the overflow plate, which is usually located near the faucet.
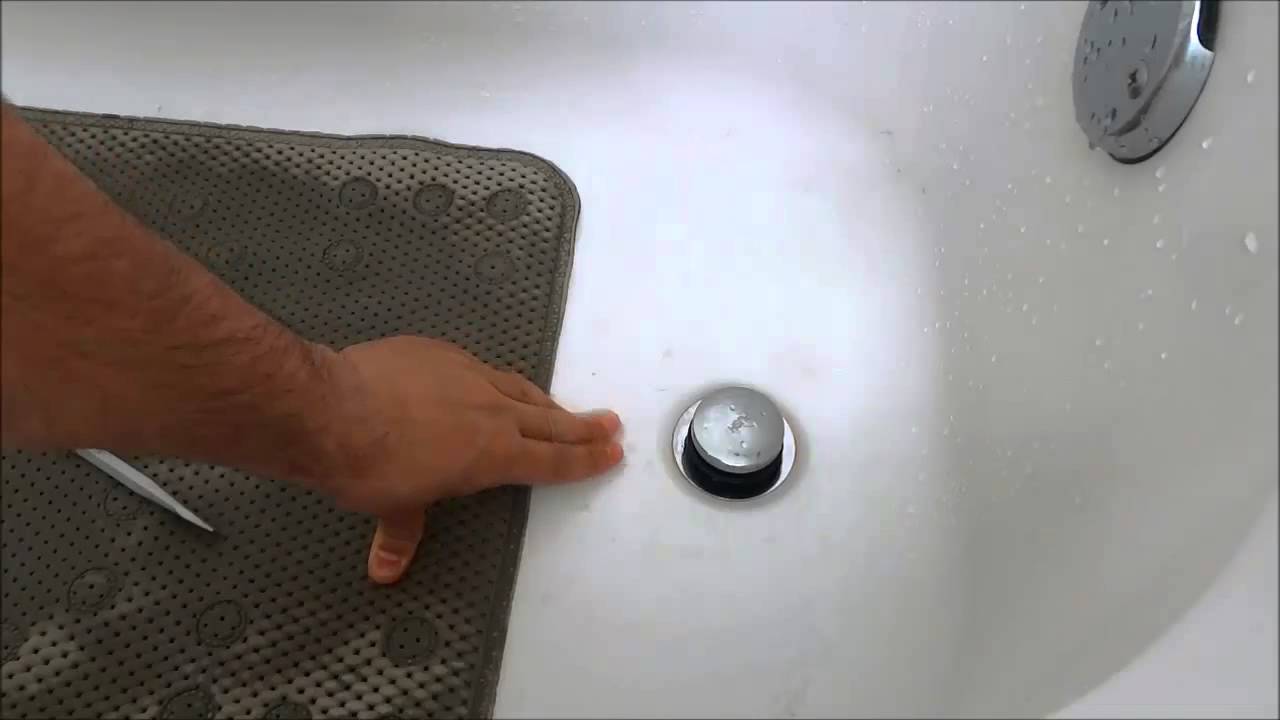
Toe-Touch Stoppers
Toe-touch stoppers are designed to be operated with your foot. You press down on the stopper to open or close the drain. These are a bit trickier to remove because they’re often held in place by a nut underneath the tub.
Twist-and-Drain Stoppers
As the name suggests, these stoppers require you to twist them to open or close the drain. They’re typically found in older tubs and can be challenging to remove without the right tools.
Read also:Mastering Contour Makeup For Fair Skin The Ultimate Guide To Flawless Features
Old-School Plugs
Some tubs still use the classic rubber plug system. These are relatively easy to remove since they’re not attached to any mechanism. Just pull them out and you’re good to go!
Knowing the type of stopper you’re dealing with is key to successfully removing it. So take a moment to identify yours before proceeding.
Tools You’ll Need to Get the Job Done
Every DIY project requires the right tools, and removing a bathtub stopper is no exception. Here’s a list of what you’ll need:
- Screwdriver (Phillips or flathead, depending on your stopper)
- Pliers or wrench
- Gloves (to keep your hands clean and protected)
- Bucket (to catch any water that might spill)
- Vinegar and baking soda (for cleaning purposes)
Having these tools on hand will make the process smoother and more efficient. Plus, it’s always good to be prepared for any unexpected challenges that might arise.
Step-by-Step Guide: How to Take the Stopper Out of a Tub
Now that you’re familiar with the types of stoppers and the tools you’ll need, let’s dive into the step-by-step process of removing your bathtub stopper. Follow these instructions carefully, and you’ll have that stopper out in no time.
Step 1: Turn Off the Water Supply
Before you start messing around with the stopper, it’s a good idea to turn off the water supply to avoid any accidental flooding. Locate the shut-off valve under the sink or near the tub and turn it clockwise until it’s completely off.
Step 2: Remove the Overflow Plate (For Pop-Up Stoppers)
If you’re dealing with a pop-up stopper, the first thing you need to do is remove the overflow plate. This is usually held in place by screws, so use your screwdriver to carefully unscrew it. Set the plate aside for now.
Step 3: Locate the Stopper Mechanism
Once the overflow plate is off, you should be able to see the stopper mechanism. This is the part that controls the movement of the stopper. Depending on the design, it might be connected to a rod or a lever. Gently pull the mechanism out of the overflow tube.
Step 4: Detach the Stopper
With the mechanism removed, you can now focus on the stopper itself. Use your pliers or wrench to unscrew any nuts or bolts holding the stopper in place. Once it’s loose, simply pull it out of the drain.
Step 5: Clean the Drain
Now that the stopper is out, take the opportunity to clean the drain thoroughly. Use a mixture of vinegar and baking soda to remove any buildup or debris. This will ensure your tub drains smoothly in the future.
And there you have it! With these simple steps, you’ve successfully removed the stopper from your bathtub. Wasn’t that easy?
Common Issues and How to Fix Them
Even with the best intentions, things don’t always go as planned. Here are some common issues you might encounter while trying to remove your bathtub stopper and how to fix them:
Problem: The Stopper Won’t Budge
Solution: If the stopper seems stuck, try applying some lubricant (like WD-40) around the edges. Let it sit for a few minutes, then attempt to remove it again. If that doesn’t work, you might need to use a bit more force with your pliers.
Problem: Water Keeps Leaking
Solution: Make sure the water supply is completely turned off. If the leak persists, there might be a problem with the plumbing. In this case, it’s best to consult a professional plumber.
Problem: Can’t Find the Right Tools
Solution: Don’t panic! Most hardware stores carry the tools you’ll need. If you’re unsure, ask a store associate for help. They’re usually happy to assist and can even recommend the best tools for your specific situation.
By addressing these issues head-on, you’ll be able to complete the job without any major hiccups.
Expert Tips for a Smooth Process
Here are a few expert tips to make the process of removing your bathtub stopper even smoother:
- Work in a Well-Lit Area: Good lighting will help you see what you’re doing and avoid mistakes.
- Take Photos as You Go: This will come in handy when it’s time to reassemble everything.
- Be Patient: Rushing the process can lead to mistakes or damage. Take your time and do it right the first time.
These tips might seem simple, but they can make a big difference in the overall success of your project.
How to Maintain Your Bathtub Stopper
Now that you’ve successfully removed the stopper, let’s talk about how to maintain it to prevent future problems. Regular maintenance can extend the life of your stopper and keep your tub functioning properly.
- Regular Cleaning: Clean the stopper and drain every few months to prevent buildup.
- Check for Damage: Inspect the stopper for signs of wear and tear. Replace it if necessary.
- Use Drain Strainers: These can help catch hair and debris before they enter the drain, reducing the risk of clogs.
By following these maintenance tips, you’ll ensure your bathtub stays in top condition for years to come.
Conclusion: Take Action Today!
Taking the stopper out of a tub might seem intimidating at first, but with the right approach, it’s a task anyone can tackle. From identifying the type of stopper to using the correct tools, each step is designed to make the process as smooth and stress-free as possible.
Remember, the key to success is preparation and patience. Don’t rush the process, and don’t hesitate to seek help if you get stuck. And once you’ve completed the job, take a moment to appreciate your hard work. You’ve just saved yourself a lot of money and gained a valuable new skill!
So what are you waiting for? Grab your tools, roll up your sleeves, and get started today. And when you’re done, don’t forget to share your experience in the comments below. We’d love to hear how it went!
Daftar Isi
- Why Would You Need to Remove a Bathtub Stopper?
- Types of Bathtub Stoppers You Need to Know
- Tools You’ll Need to Get the Job Done
- Step-by-Step Guide: How to Take the Stopper Out of a Tub
- Common Issues and How to Fix Them
- Expert Tips for a Smooth Process
- How to Maintain Your Bathtub Stopper
- Conclusion: Take Action Today!
Article Recommendations
:max_bytes(150000):strip_icc()/stuck-trip-lever-drain-stopper-3973581-04-c0985d4a83474ceabc44c582af2cbdbc.jpg)