Snow Paint For Windows: Transform Your Windows Into A Winter Wonderland
Hey there, winter enthusiasts! Are you ready to sprinkle some magic into your home this holiday season? Snow paint for windows is the ultimate game-changer when it comes to creating a festive atmosphere. Whether you're decorating for Christmas, Hanukkah, or just want to embrace the winter spirit, this magical product will make your windows sparkle like a snow-covered wonderland. So, grab your brushes and let’s dive into the world of snow paint for windows!
Let’s face it, winter is all about cozy vibes, twinkling lights, and creating magical moments with loved ones. But what if you could take your holiday decor to the next level? That’s where snow paint for windows comes in. This innovative product allows you to transform plain glass into a frosty masterpiece without the hassle of real snow. It’s perfect for those who live in warmer climates or simply want to add a touch of winter charm to their homes.
Now, before we dive deeper, let’s talk about why snow paint for windows is becoming a must-have for decorators and DIY enthusiasts alike. It’s easy to use, versatile, and adds that extra sparkle your home needs during the holiday season. Plus, it’s eco-friendly and safe for families with kids and pets. So, whether you’re a seasoned decorator or a first-timer, this guide will help you master the art of snow painting on windows.
Read also:Demi Moores New Bob Haircut A Bold Transformation Thats Turning Heads
What is Snow Paint for Windows?
So, what exactly is snow paint for windows? Simply put, it’s a special type of paint designed specifically to adhere to glass surfaces, creating a frosted, snowy effect. Unlike traditional paints, snow paint dries clear but gives the appearance of frost when applied. It’s perfect for mimicking the look of winter frost on your windows without the mess or damage that comes with real snow.
Here’s the best part: snow paint for windows is super easy to apply and remove. You don’t need any special skills or tools to get started. Just a few basic supplies and you’re good to go. Whether you want to create intricate snowflake designs or a simple frosty texture, snow paint has got you covered. Plus, it’s reusable, so you can save it for next year’s holiday decorations.
Why Use Snow Paint for Windows?
There are countless reasons why snow paint for windows is a fantastic choice for your holiday decor. First off, it’s incredibly versatile. You can use it on any glass surface, from windows and mirrors to glass doors and even glass ornaments. It’s also a great way to get creative with your decorations without spending a fortune on expensive decor items.
Another advantage of snow paint is its durability. Unlike other types of window decorations, snow paint won’t peel or flake off easily. It’s designed to withstand normal wear and tear, so you can enjoy your frosty masterpiece for weeks without worrying about it fading or smudging. Plus, it’s safe for indoor use, making it a great option for families with kids and pets.
Key Benefits of Snow Paint for Windows
- Eco-friendly and non-toxic
- Easy to apply and remove
- Versatile for various glass surfaces
- Durable and long-lasting
- Perfect for DIY projects and creative designs
How to Use Snow Paint for Windows
Now that you know what snow paint for windows is and why it’s so awesome, let’s talk about how to use it. The process is surprisingly simple, and even if you’re not the most artistic person, you can still achieve stunning results. Here’s a step-by-step guide to help you get started:
Step 1: Gather Your Supplies
Before you start, make sure you have all the necessary supplies. You’ll need snow paint for windows, a clean cloth or sponge for application, and some stencils or templates if you want to create specific designs. You can also use a brush or foam applicator for more detailed work.
Read also:Best Makeup For Makeup Artist Kit Your Ultimate Guide
Step 2: Clean Your Glass Surface
It’s important to clean your glass surface thoroughly before applying snow paint. Use a glass cleaner and a lint-free cloth to remove any dirt, dust, or grease. This will ensure that the paint adheres properly and gives you a smooth finish.
Step 3: Apply the Paint
Once your glass surface is clean and dry, it’s time to apply the snow paint. You can use a sponge, brush, or foam applicator to apply the paint in even strokes. For a frosted effect, apply the paint in a thin, even layer. If you want to create snowflake designs, use stencils or freehand your designs with a brush.
Step 4: Let It Dry
After applying the paint, let it dry completely before touching or moving the glass surface. Depending on the brand and thickness of the application, drying time can vary from a few minutes to an hour. Make sure to follow the instructions on the product packaging for the best results.
Popular Snow Paint for Windows Brands
When it comes to choosing the right snow paint for windows, there are several brands on the market that offer high-quality products. Here are some of the most popular options:
- Frosting Effects: Known for its easy application and durable finish, Frosting Effects is a top choice for many decorators.
- Frosted Window Film: While not a paint, this adhesive film creates a similar frosted effect and is reusable for multiple seasons.
- Stenciled Snow Paint: Perfect for those who love intricate designs, this brand offers a wide range of stencils and templates for snowflake patterns.
When choosing a brand, consider factors like ease of application, durability, and price. Reading reviews and checking out tutorials can also help you make an informed decision.
Tips for Creating Stunning Designs with Snow Paint
Want to take your snow paint designs to the next level? Here are some tips to help you create stunning, professional-looking results:
1. Experiment with Stencils
Stencils are a great way to create intricate snowflake designs without worrying about making mistakes. You can find pre-made stencils online or create your own using cardstock or vinyl. Just place the stencil on the glass surface and apply the paint carefully with a brush or sponge.
2. Layer Your Designs
For a more dimensional look, try layering your snow paint designs. Start with a base layer of frosted paint, then add details like snowflakes or swirls on top. This technique will give your designs depth and make them stand out.
3. Use Different Shades
While snow paint is typically white, some brands offer different shades like silver or blue to add variety to your designs. Mixing and matching colors can create a unique and eye-catching effect.
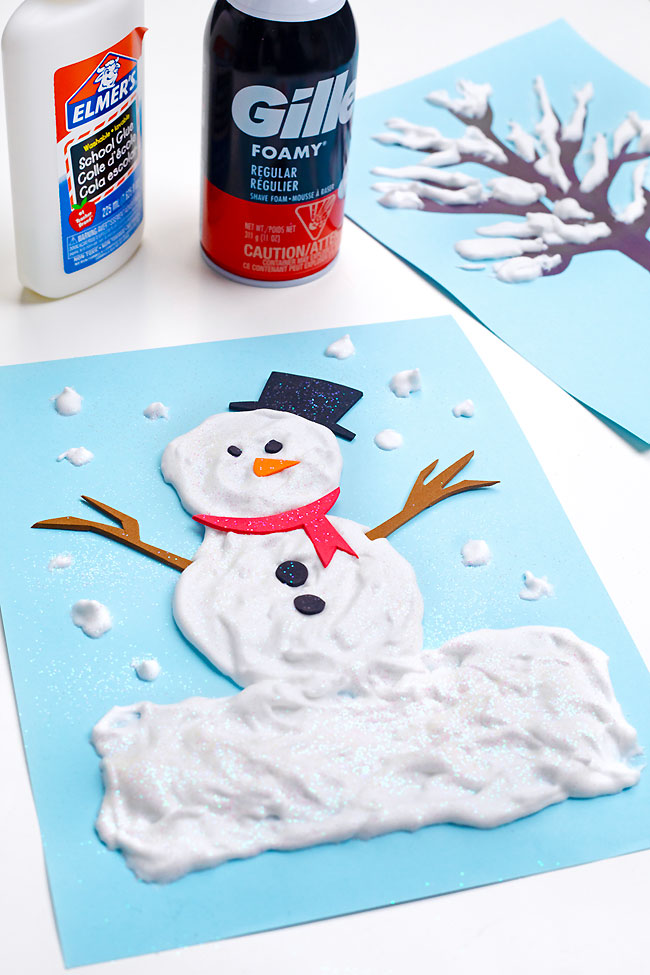
DIY Snow Paint for Windows: Is It Worth It?
If you’re feeling adventurous, you can try making your own snow paint for windows at home. While store-bought options are convenient and reliable, DIY snow paint can be a fun and cost-effective alternative. Here’s a simple recipe to get you started:
Ingredients:
- White craft glue
- Glitter (optional)
- Water
Instructions:
- Mix equal parts white craft glue and water in a bowl until the mixture is smooth and runny.
- Add a pinch of glitter for a sparkly effect (optional).
- Use a brush or sponge to apply the mixture to your glass surface.
- Let it dry completely before touching or moving the glass.
DIY snow paint is a great option if you’re on a budget or want to customize your designs. However, keep in mind that homemade paint may not be as durable as store-bought options, so it’s best for short-term use.
Common Mistakes to Avoid
While snow paint for windows is easy to use, there are a few common mistakes that can ruin your designs. Here’s what to watch out for:
1. Applying Too Much Paint
Using too much paint can result in a thick, uneven layer that takes longer to dry and may peel off easily. Stick to thin, even layers for the best results.
2. Not Cleaning the Surface Properly
Dirt, dust, and grease can prevent the paint from adhering properly, leading to smudges and streaks. Always clean your glass surface thoroughly before applying snow paint.
3. Rushing the Drying Process
Patience is key when working with snow paint. Rushing the drying process can cause the paint to smudge or peel. Follow the drying instructions on the product packaging and avoid touching the paint until it’s completely dry.
Where to Buy Snow Paint for Windows
Now that you know all about snow paint for windows, where can you buy it? Here are some popular places to find high-quality snow paint:
- Online Retailers: Websites like Amazon, Etsy, and Walmart offer a wide selection of snow paint products at competitive prices.
- Craft Stores: Local craft stores often carry snow paint and related supplies. Check out stores like Michaels or Hobby Lobby for great deals.
- Specialty Stores: If you’re looking for unique or custom designs, specialty stores that focus on holiday decor may have exactly what you need.
When shopping for snow paint, make sure to read reviews and check the product specifications to ensure you’re getting a high-quality product that meets your needs.
Conclusion: Embrace the Winter Spirit with Snow Paint for Windows
And there you have it, folks! Snow paint for windows is an amazing way to add a touch of winter magic to your home this holiday season. Whether you’re a seasoned decorator or a first-timer, this versatile product is easy to use and creates stunning results. So, why not give it a try? Your windows will thank you, and your guests will be wowed by your creative flair.
Before you go, don’t forget to share your snow paint creations with us in the comments below. We’d love to see how you’re transforming your home into a winter wonderland. And if you’re looking for more holiday decor ideas, be sure to check out our other articles on the site. Happy decorating, and may your winter be as magical as your snow-painted windows!
Table of Contents
- Snow Paint for Windows: Transform Your Windows into a Winter Wonderland
- What is Snow Paint for Windows?
- Why Use Snow Paint for Windows?
- How to Use Snow Paint for Windows
- Popular Snow Paint for Windows Brands
- Tips for Creating Stunning Designs with Snow Paint
- DIY Snow Paint for Windows: Is It Worth It?
- Common Mistakes to Avoid
- Where to Buy Snow Paint for Windows
- Conclusion: Embrace the Winter Spirit with Snow Paint for Windows
Article Recommendations