How To Take Off Press On Nails At Home: A Step-by-Step Guide For Your DIY Nail Game
Alright, listen up, nail enthusiasts! If you're reading this, chances are you've fallen head over heels for press-on nails. They’re quick, easy, and give you that salon-perfect look without breaking the bank. But here’s the deal—what happens when it’s time to take them off? Don’t worry, we’ve all been there. Removing press-on nails at home doesn’t have to be a headache-inducing process. With the right tools and a little know-how, you can say goodbye to those sparkly beauties without damaging your natural nails. Let’s dive in!
Now, let’s face it—press-on nails are a game-changer. They save you time, money, and effort. But when it’s time to remove them, things can get a little tricky if you’re not prepared. That’s where this guide comes in. We’re here to break it down for you step by step so you can confidently rock your natural nails again without any drama.
Before we get into the nitty-gritty, let me assure you that taking off press-on nails at home is totally doable. You don’t need a fancy salon setup or expensive tools. All you need is a bit of patience, the right products, and a few simple techniques. Ready to learn how to take off press-on nails like a pro? Let’s go!
Read also:Womens Perfume That Lasts All Day The Ultimate Guide For Scent Lovers
Why Removing Press-On Nails at Home is a Must-Know Skill
Let’s be real—press-on nails are amazing, but they don’t last forever. Whether you’ve worn them for a week or just want to switch up your look, knowing how to remove them safely is essential. Not only does it save you money, but it also ensures your natural nails stay healthy and strong. Plus, who doesn’t love mastering a DIY beauty skill?
Common Mistakes People Make When Removing Press-On Nails
Here’s the thing—removing press-on nails might seem straightforward, but a lot of people make mistakes that end up damaging their natural nails. Some common blunders include using harsh chemicals, prying off the nails with sharp tools, or skipping the soaking process altogether. These mistakes can lead to brittle nails, peeling, or even nail bed injuries.
To avoid these pitfalls, it’s important to follow a proper removal process. This guide will walk you through every step, ensuring your nails come out looking as good as they did when you first put them on.
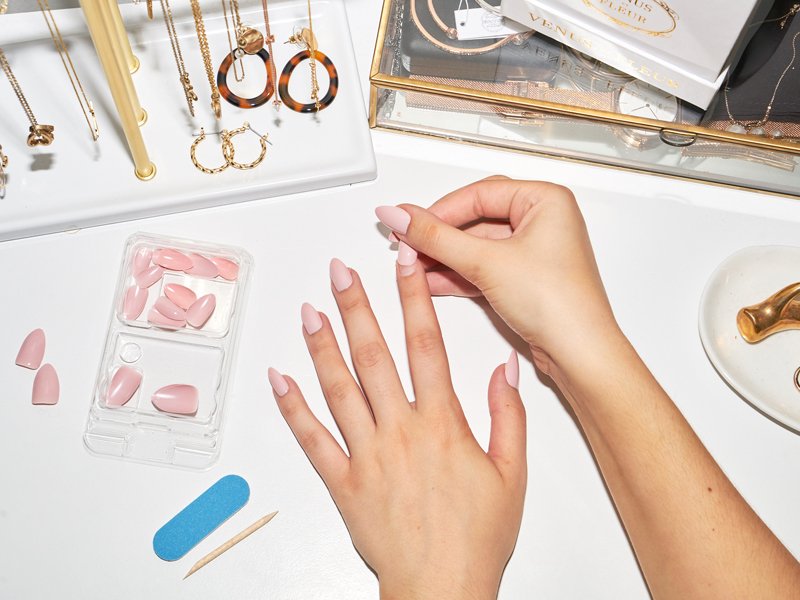
What You’ll Need to Safely Remove Press-On Nails
Before we jump into the steps, let’s talk about the tools and products you’ll need. Having the right supplies on hand will make the process smoother and more effective. Here’s what you’ll need:
- Nail polish remover (preferably acetone-free)
- Cotton balls or cotton pads
- Aluminum foil (optional)
- Nail file or buffer
- Cuticle oil or lotion
- A small bowl of warm water
- Nail clippers or cuticle nippers (if necessary)
Pro tip: If you’re sensitive to acetone, opt for a gentler nail polish remover. Your nails will thank you later!
Step-by-Step Guide to Removing Press-On Nails
Step 1: Prepare Your Workspace
Start by setting up a comfortable workspace. Clear off a table or counter, gather all your supplies, and make sure you have plenty of lighting. Trust me, working in a clutter-free space makes the process way less stressful.
Read also:Kate Spade Orange Bag A Musthave Accessory For Every Fashionista
Step 2: Soak Off the Glue
This is arguably the most important step. Dampen a cotton ball with nail polish remover and gently press it onto one of your nails. Then, wrap the cotton ball and nail with a small piece of aluminum foil. Let it sit for about 10-15 minutes. Repeat this process for each nail.
Why the foil, you ask? It helps trap the moisture and accelerates the breakdown of the adhesive. Plus, it keeps your fingers from getting all sticky and messy.
Step 3: Gently Wiggle Off the Nails
After soaking, the glue should start to loosen. Use your fingers or a cuticle stick to gently wiggle the press-on nail off. Avoid using force or sharp tools, as this can damage your natural nails. If the nail doesn’t come off easily, reapply the remover and let it soak a bit longer.
Step 4: Clean Up the Glue Residue
Once all the press-ons are off, you might notice some glue residue left behind. Don’t panic! Simply dampen another cotton ball with remover and gently wipe away any leftover glue. Be careful not to scrub too hard, as this can irritate your skin.
Step 5: Buff and Shape Your Nails
Now that your natural nails are free from glue and press-ons, it’s time to give them a little TLC. Use a nail file to smooth out any rough edges or ridges. You can also shape your nails to your desired style—whether that’s square, oval, or almond.
Step 6: Moisturize and Pamper
Finally, finish off the process by applying cuticle oil or lotion to your nails and surrounding skin. This will help hydrate and rejuvenate your nails after the removal process. Bonus points if you massage the oil in for a mini spa experience!
Tips for Keeping Your Natural Nails Healthy
Taking care of your natural nails is just as important as maintaining your press-ons. Here are a few tips to keep your nails in tip-top shape:
- Moisturize regularly to prevent dryness and cracking
- Avoid biting or picking at your nails
- Use a base coat before applying polish to protect your nails
- Eat a balanced diet rich in vitamins and minerals
- Stay hydrated to promote nail health
By incorporating these habits into your routine, you’ll ensure your nails stay strong and healthy, no matter how often you switch up your press-ons.
Common Questions About Removing Press-On Nails
Can I Use Acetone to Remove Press-On Nails?
While acetone is effective at breaking down adhesives, it can be harsh on your nails and skin. If you choose to use acetone, make sure to follow up with a good moisturizer to counteract its drying effects. Alternatively, opt for acetone-free removers for a gentler option.
How Long Should I Soak My Nails?
For best results, soak each nail for about 10-15 minutes. If the glue doesn’t seem to be loosening, you can extend the soaking time by a few more minutes. Just be mindful not to leave the remover on for too long, as this can dry out your skin.
Can I Reuse Press-On Nails After Removal?
It depends on the condition of the nails after removal. If they’re still in good shape and the adhesive is intact, you might be able to reuse them. However, for optimal results, it’s usually best to replace them with a fresh set.
Why This Guide Stands Out
There’s a ton of information out there about removing press-on nails, but not all of it is created equal. This guide is different because it focuses on safety, simplicity, and effectiveness. By following these steps, you’ll not only remove your press-ons with ease but also protect your natural nails in the process.
Plus, we’ve included plenty of tips and tricks to help you master the art of DIY nail care. Whether you’re a seasoned pro or a total newbie, this guide has something for everyone.
Conclusion: Take Charge of Your Nail Game
Taking off press-on nails at home doesn’t have to be a daunting task. With the right tools, techniques, and a little patience, you can do it like a pro. Remember to prioritize the health of your natural nails and don’t be afraid to experiment with different methods until you find what works best for you.
So, what are you waiting for? Grab your supplies and get to work! And don’t forget to share your experience in the comments below. We’d love to hear how this guide helped you conquer your DIY nail journey. Happy filing, soaking, and pampering!
Table of Contents
- Introduction
- Why Removing Press-On Nails at Home is a Must-Know Skill
- Common Mistakes People Make When Removing Press-On Nails
- What You’ll Need to Safely Remove Press-On Nails
- Step-by-Step Guide to Removing Press-On Nails
- Tips for Keeping Your Natural Nails Healthy
- Common Questions About Removing Press-On Nails
- Why This Guide Stands Out
- Conclusion: Take Charge of Your Nail Game
Article Recommendations