Hey there, nail enthusiasts! If you're scrolling through this article, chances are you're already head-over-heels for nail art daisy design. And let's be real, who wouldn't want their nails to look like a field of fresh daisies? This trend is not just about flowers; it's about turning your nails into a canvas of creativity and joy. So, buckle up because we're diving deep into the world of nail art daisy design, where every stroke tells a story and every petal shines with personality.
But before we get our hands dirty—er, painted—let’s talk about why this design has become such a big deal. Nail art daisy design isn’t just a fleeting trend; it’s a timeless classic that brings a touch of nature to your fingertips. Whether you're a minimalist who loves simplicity or a maximalist who craves bold statements, daisy nail art has something for everyone.
Now, if you're wondering why we're so obsessed with this particular design, let me break it down for you. It’s not just about the flowers—it’s about the vibe they bring. Daisies are cheerful, carefree, and oh-so-easy to fall in love with. So, without further ado, let’s dive into this ultimate guide and see how you can make your nails bloom!
Read also:No White Pants After Labor Day A Fashion Rule You Need To Know
Alright, let's get real here. Nail art daisy design isn't just some random trend that popped up overnight. This design has been around for a while, but it's only now that it's truly having its moment in the spotlight. Why? Because people are craving something fresh, fun, and full of life. And what better way to express that than with a daisy on your nails?
According to a recent survey by Statista, nail art designs featuring flowers have seen a 30% increase in popularity over the past year. That’s huge! And daisies, in particular, are leading the charge. Why? Because they’re versatile, easy to paint, and they add a pop of color to any outfit.
Plus, daisies have this universal appeal. They’re not too fussy, not too complicated, and they work with almost every skin tone. Whether you're rocking a classic white-on-blue combo or experimenting with neon shades, daisy nail art is your new best friend.
Before you start painting, you’ll need the right tools and materials. Don’t worry; you don’t need a professional setup to pull off this look. Here’s a quick rundown of what you’ll need:
Remember, you don’t need to spend a fortune on these tools. A good-quality set from your local drugstore will do just fine. And if you’re a beginner, don’t stress too much about perfection. Practice makes perfect, and every attempt brings you closer to nail art mastery.
Now that you’ve got your tools ready, it’s time to get creative. Follow these simple steps, and you’ll have daisy nails in no time:
Read also:Gel Polish Ideas For Short Nails Short But Stunning
Start by cleaning your nails and applying a base coat. This step is crucial because it creates a smooth surface for painting and prevents the polish from staining your nails.
Select a color that complements the daisies. Blues, greens, and pastels are popular choices, but feel free to go bold if that’s your style. Apply two thin coats of polish and let them dry completely.
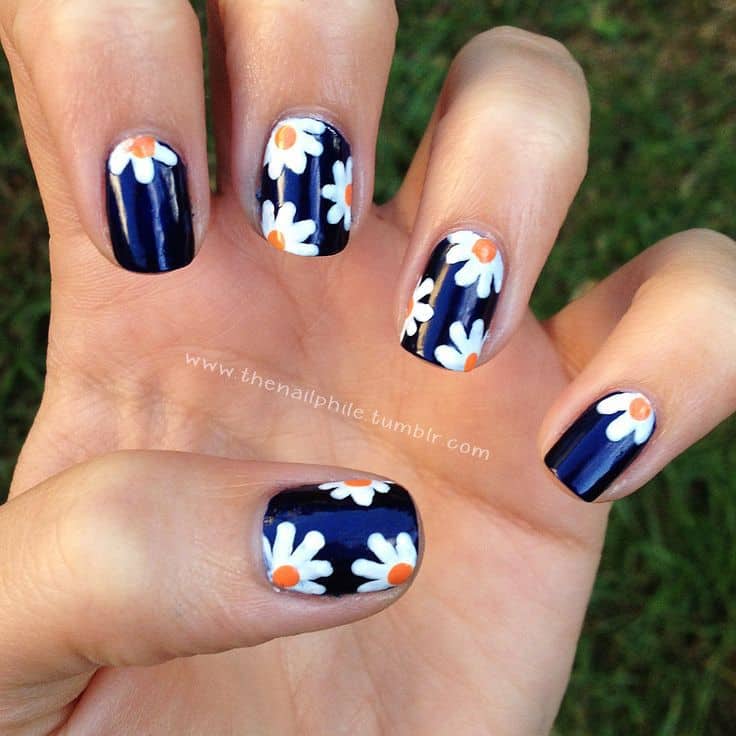
Using your fine art brush, start by painting the center of the daisy. A small dot of yellow or orange works perfectly. Then, paint the petals around the center. Aim for five or six petals for a classic daisy look.
Once the daisies are dry, you can add details like shading or outlines to make them pop. This step is optional but highly recommended for a polished look.
Finally, seal your masterpiece with a top coat. This will protect your design and give it a glossy finish.
And there you have it—your very own daisy nails! Wasn’t that easy? Now, let’s move on to some tips and tricks to take your nail art to the next level.
Here are a few insider tips to help you master the art of daisy nails:
Remember, the key to great nail art is confidence. Trust your skills, and don’t be afraid to make mistakes. After all, every mistake is just another opportunity to learn and grow.
Now that you’ve got the basics down, let’s talk about some popular variations of nail art daisy design:
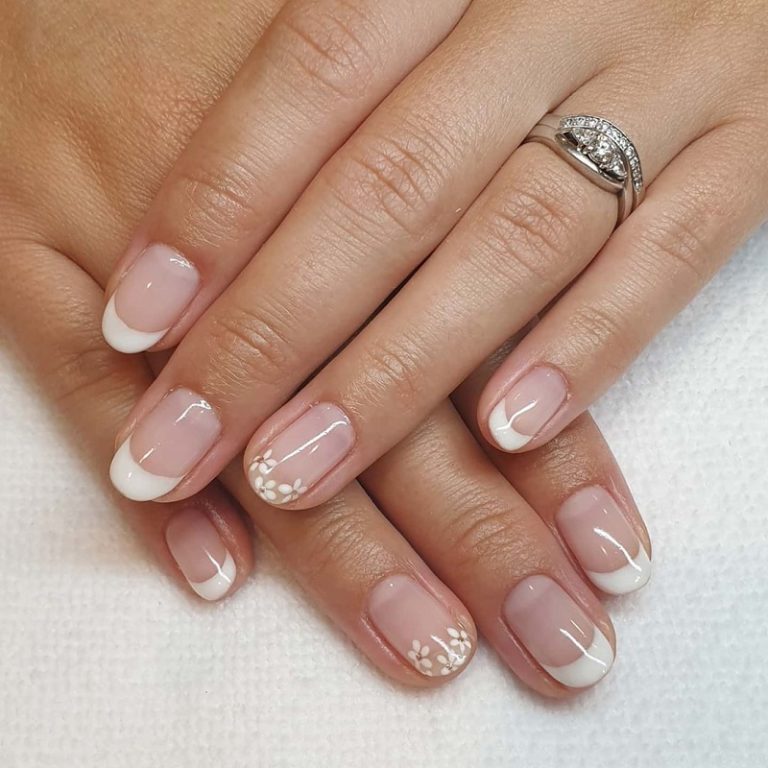
These designs focus on simplicity and elegance. Think white daisies on a pastel base or a single daisy on an otherwise plain nail.
If you’re not afraid to make a statement, go for bright colors and oversized daisies. These designs are sure to turn heads!
This variation combines a gradient background with daisy designs. The result is a stunning ombre effect that’s both chic and playful.
For a truly unique look, try 3D daisy nails. These designs use acrylic or gel to create raised flowers that look almost real.
There’s no limit to what you can do with nail art daisy design. The only limit is your imagination!
Feeling stuck? No worries! There are plenty of places to find inspiration for your next daisy nail design:
Remember, inspiration can come from anywhere. Keep your eyes open, and don’t be afraid to experiment with new ideas.
Even the best nail artists make mistakes sometimes. Here are a few common pitfalls to watch out for:
By avoiding these mistakes, you’ll ensure that your daisy nails look flawless every time.
Did you know that nail art can have a psychological impact? According to experts, daisy nails, in particular, can boost your mood and confidence. Why? Because daisies are associated with positivity, purity, and new beginnings. Wearing daisy nails can remind you to embrace life’s simple joys and focus on the good things.
Plus, there’s something inherently satisfying about creating art on your nails. It’s a form of self-expression that allows you to showcase your personality and creativity. So, the next time you’re feeling down, try painting some daisies on your nails. You might be surprised at how much better you feel!
Now that you’ve created your masterpiece, it’s time to take care of it. Here are a few tips for maintaining your daisy nails:
With proper care, your daisy nails can last for weeks. And when it’s time for a change, you’ll be ready to tackle the next design with confidence.
So, there you have it—everything you need to know about nail art daisy design. From its trending status to step-by-step guides and tips, we’ve covered it all. Nail art daisy design isn’t just about fashion; it’s about expressing yourself and celebrating the beauty of nature.
Now, it’s your turn to take action. Whether you’re a seasoned pro or a total beginner, grab your tools and start creating. And don’t forget to share your designs with us! We’d love to see your daisy nails and hear about your experience.
Until next time, keep blooming and keep shining!